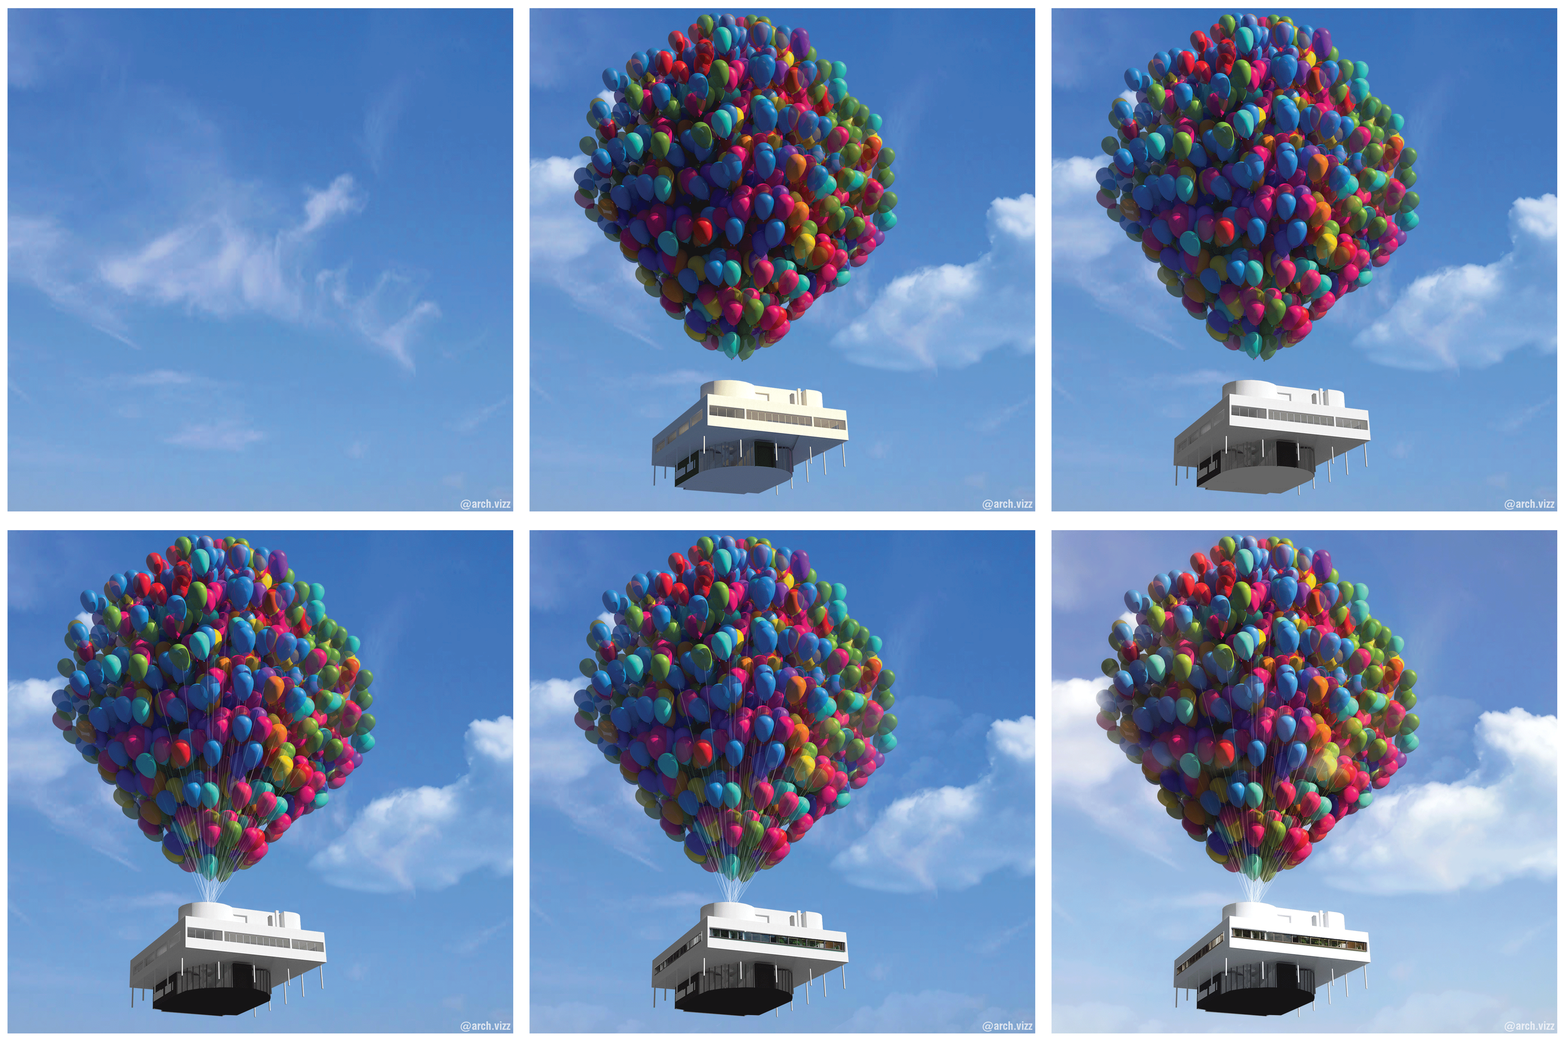
UP vs CORBUSIER
#STAYHOME
Corbusier travels the world! This is a quick and fun tutorial for you to practice your skills in Photoshop. At the end of the tutorial, you’ll be able to download the Villa Savoye with the balloons as a PNG to Photoshop your own images. Where else will you take the Villa Savoye?
1 | BASE IMAGE
For a fast way to take a look at your colors and materials, try Rhino Arctic mode. This mode will add a soft shadow to your image and remove the curve outline, so you can preview your materials better before rendering it in Vray.
Screenshot from Rhino model - Shaded
Screenshot from Rhino model - Arctic
Elevation
Axon
Plan
2 | VRAY RENDERING base
A | VRAY MATERIALS
For the balloons, apply a Plastic material from the preset menu in Vray and lower the Opacity to get the transparency effect for the balloons.
By applying this same material, but changing the colors under Diffuse Color and Sub-Surface Color, you’ll get an amazing overlay of colors for a final image:
B | LIGHTING
To control the color and intensity of the scene’s light, as well as the exact location for lighting, turn off the Rhino Sun and place a Direction light instead.
The default light is white, but for this image, adding a bit of a yellow tone to the light helps neutralize some of the overall colors.
C | VRAY SETTINGS
Vray’s presets are great overall, so there isn’t much to change if you are relying on post-production in Photoshop to fix lighting, background, colors, etc. Otherwise, you can spend some time with the Asset Editor to adjust every aspect of your rendering.
Render Output: Here is where you control the size and aspect ratio of the exported image. Adjust it according to the desired size and proportions.
Environment: The default is a white background, so if you want, add a sky texture for the background.
There is a lot more that can be done in Vray, but for this image, these are the only changes that were made.
D | vray!
Vray renderings take a little while to process, but the results are amazing. The more time you spend adjusting the Asset editor elements, the more realistic results you can have.
Since for this image, most of these adjustments were made in Photoshop, it was important to export some render elements together with the PNG base.
Lighting, Material ID, Object ID and Shadows are very helpful to make quick selections in Photoshop and adjust selected areas.
Render elements from Vray Asset Editor
PNG Base
Material ID
Shadows
Object ID
3 | PHOTOSHOP WORKFLOW
For this image, the Photoshop workflow was very simple.
STEP 1 | Add background.
To balance out the colors, I chose a background that would match the blue balloons from the PNG base and added white clouds to the top part of the image to will also distribute some of the white tones of the Villa Savoye.
STEP 2 | Add details.
The balloons’ strings are simple white lines made with a brush in photoshop, and the windows were collaged from an image of the Villa Savoye. This gives the house a more realistic feeling without having to spend too much time modeling it in Rhino.
STEP 3 | Adjust lighting and overall tones.
Always take time to adjust your image after you’re done collaging all of the elements together. A quick way to do it is using Camera Raw and the Dodge and Burn tool. Follow the HOW TO Post-production tutorial for a more in depth explanation of this step.
Voilà! Follow these steps to take Corbusier to other places in the world!
Click here to download the PNG image and try it out!
Any questions or suggestions? Leave a comment!
Renderings and Tutorial by Stefani Fachini


