ILLUSTRATED ENTOURAGE
ILLUSTRATOR WORKFLOW:
If you don’t want to use realistic cutouts in your drawings, this is a great way to quickly turn them into illustrations.
Before starting this tutorial, choose any cutout you like and place it in illustrator as a JPEG or PNG.
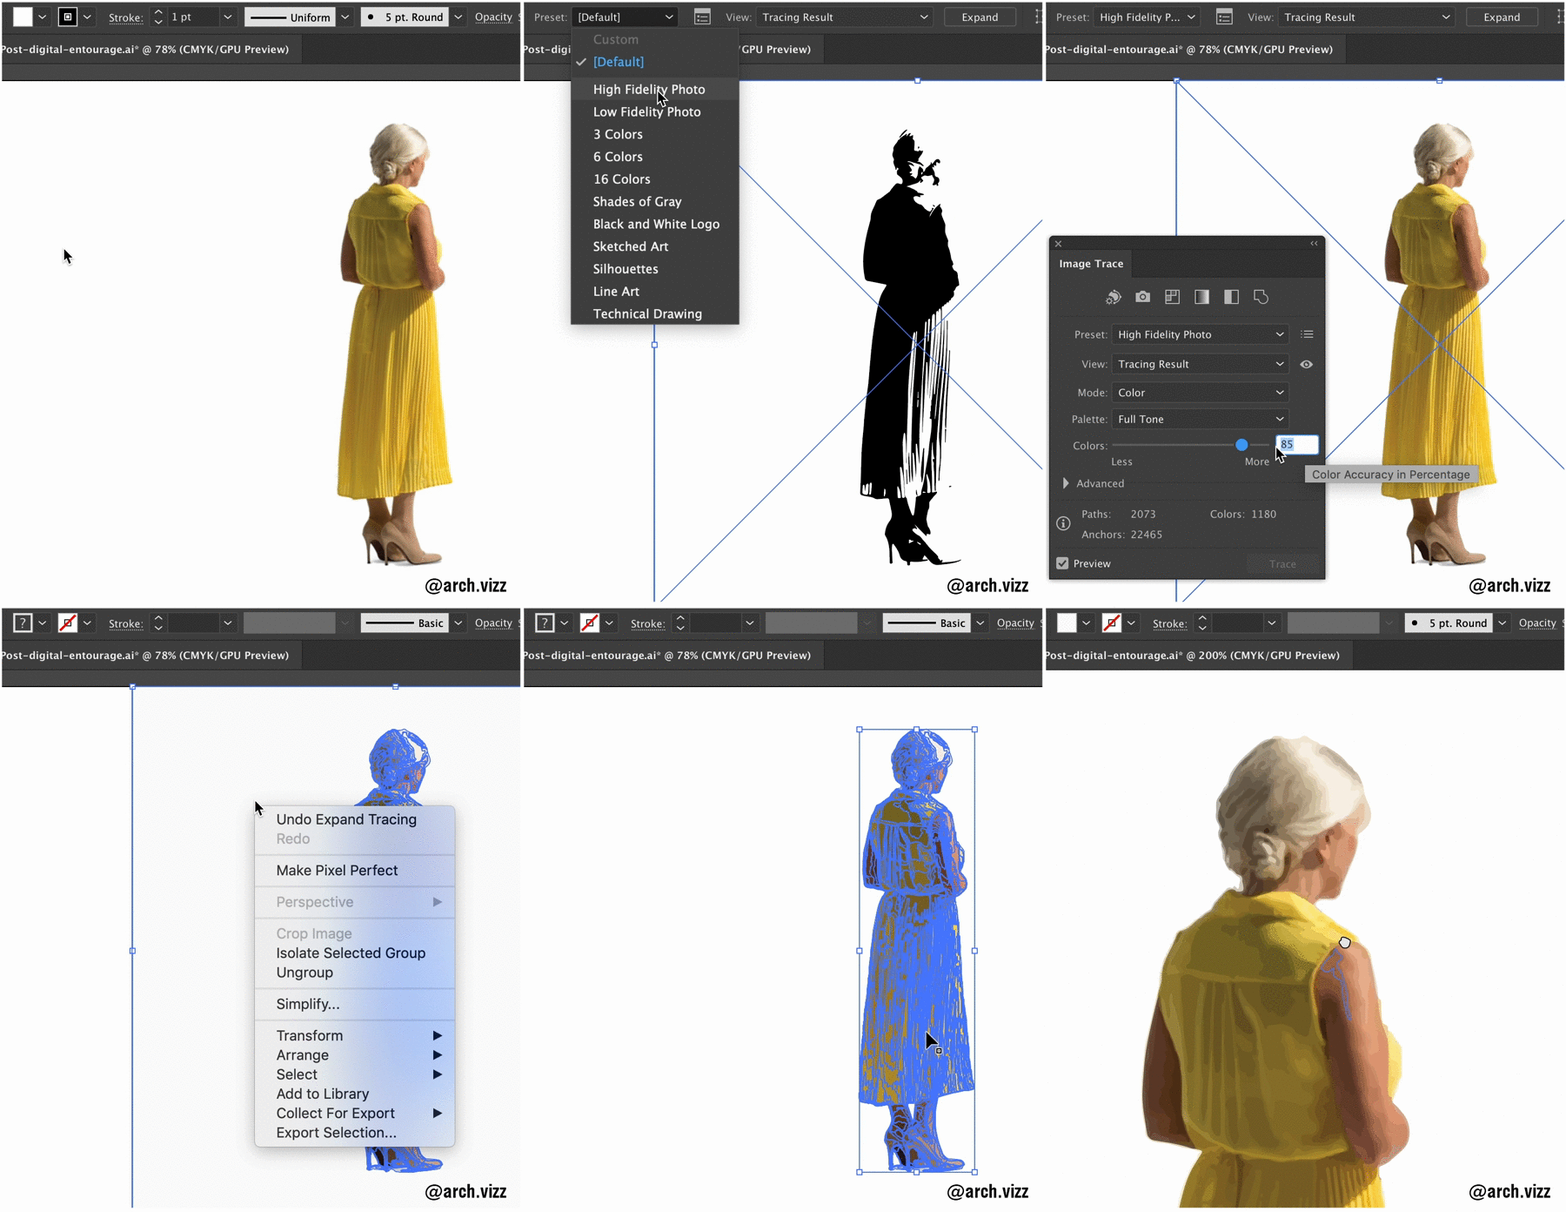
01 | Image Trace.
Image trace will quickly turn your raster image into a vector base file with just one click. You can find this tool in the top menu by simply clicking on the placed image.
Select object > Image trace > Make
02 | Choose a preset.
Illustrator already comes with a variety of presets, which control the variables for the final tracing result. The default tracing is black and white, but you can use the image trace menu to change the palette, mode, color quantity and other aspects of the image.
03 | Expand.
After you’re happy with the tracing result, select ‘expand’ in the top menu to convert the image into vector shapes.
04 | Ungroup.
Right click > Ungroup
This will release the tracing result into separate shapes. You can skip this step if you want to make any changes to the final image.
Here are some examples of the variety of results you can get from the image trace presets:
Default
Silhouettes
Shades of Gray
High Fidelity Photo
3 Colors
6 Colors
16 Colors
High Fidelity Photo - Modified Colors: 70
PRO TIP: Add more detail to your entourage so it blends in nicely with your drawings!
Original Entourage
Modified Entourage
This was the key to adding entourage to the MI CASE ES SU CASA rendering. Go check it out!
Any questions or suggestions? Leave a comment!
Tutorial by Stefani Fachini


